Posts

Showing posts from 2015

Open app in Play Store

Write below code when you want to open any app programmatically,  String appPackageName = getPackageName(); // getPackageName() from Context or Activity object appPackageName = "com.whatsapp"; try { startActivity(new Intent(Intent.ACTION_VIEW, Uri.parse("market://details?id=" + appPackageName))); } catch (android.content.ActivityNotFoundException anfe) { startActivity(new Intent(Intent.ACTION_VIEW, Uri.parse("https://play.google.com/store/apps/details?id=" + appPackageName))); } Here, appPackageName = "com.whatsapp" is static. If you comment that line, your current app open in play store.

Android Date formatter and Time formatter

Date formatter and Time formatter are the ways to convert your date to various date formats, like: 03/01/2015 to 03/01/2015, Tue 03/01/2015 to 03/01/2015, Tuesday 03/01/2015 to 03 Jan, 2015 16:30:00 to 04:30 PM 04:30:00 to 04.30 AM and many more.. SimpleDateFormat class is used to change your format of date and time. Lets look at example,  String currentDate = "03/01/2015"; String inPattern = "dd/MM/yyyy"; String outPattern = "dd/MM/yyyy, EEE"; SimpleDateFormat input = new SimpleDateFormat(inPattern); SimpleDateFormat output = new SimpleDateFormat(outPattern); Date date = null; String convertedDate = ""; try { date = input.parse(currentDate); convertedDate = output.format(date); } catch (ParseException e) { e.printStackTrace(); } output: convertedDate = 03/01/2015, Tue Explanation: currentDate is the original date. inPattern in the dateformat of currentDate DateFormat outPattern in the dateformat of your convert

Shared Preference or Session Management (Login-Logout)

Image
Android provides many ways to store data in application. One of those ways is to use of Shared Preference . Shared Preference allows you to save and retrieve data in the form of key-value pair. For getting shared preference data of your app, you have to call a method getSharedPreference() , that will return SharedPreference instance that contains key-value pairs of preference. SharedPreferences preferences = getSharedPreferences("login", Context.MODE_PRIVATE); Remember this name "login" remains same for fetching all data related to login task and also its key: Suppose, we put "isUserLogin" boolean true after login success, then first time app launch, in Launcher Screen we have to check same key "isUserLogin". if (preferences.contains("isUserLogin")) { Intent intent = new Intent(SplashActivity.this, HomeActivity.class); startActivity(intent); } else { Intent intent = new Intent(SplashActivity.this, LoginActivity.class);

New Navigation View

Image
Navigation Drawer is an important feature of any android app. Its need is when you navigate some particular pages of your app. In new android support design library, Navigation View is officially released, before we used Navigation Drawer. Let's create Navigation View.  First  Create New Project Add this library to app's build.gradle file in dependencies and click sync now : compile 'com.android.support:design:23.1.0' Now change to your layout file's content as below where you want to add drawer: <android.support.v4.widget.DrawerLayout xmlns:android="http://schemas.android.com/apk/res/android"     xmlns:tools="http://schemas.android.com/tools"     android:id="@+id/drawer_layout"     android:layout_width="match_parent"     android:layout_height="match_parent"     android:fitsSystemWindows="true"     tools:context=".MainActivity">     <LinearLayout         android:layout_wi

ToolBar

Image
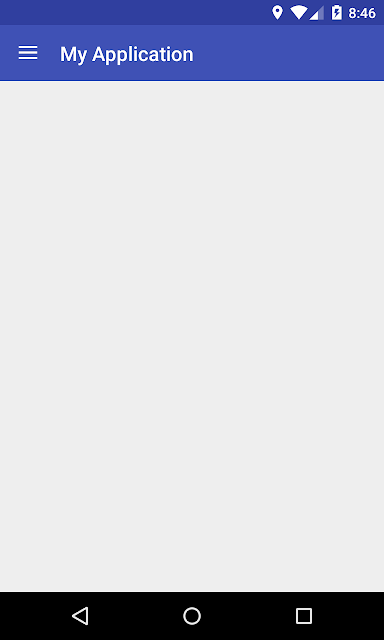
ToolBar is complete replacement of Android ActionBar. It provides greater controls to user to customize its appearance unlike Old ActionBar. Its introduced in Android Lollipop, API 21, hence its available to use in Support Design Library .  I encourage you guys to hiding ActionBar and switch to ToolBar from now since new support design library with wonderful features designed to work together with ToolBar not ActionBar. Let's do that. First Create New Project Its easy to switch to ToolBar. Just hide ActionBar from style.xml <style name="AppTheme" parent="Theme.AppCompat.Light.NoActionBar"> <!-- Customize your theme here. --> <item name="colorPrimary">@color/colorPrimary</item> <item name="colorPrimaryDark">@color/colorPrimaryDark</item> <item name="colorAccent">@color/colorAccent</item> </style> Now run your project. You see below output with

Creating New Project in Android Studio

Image
Say good bye to workspace, welcome to modules. From now a days, we will develop any code in Android Studio. For that, today I'll teach you, how to create android project in Android Studio. Download Android Studio  and install in your system with JAVA installed. After installing Android Studio, create new project as shown below: Then you can see below screen: Here there are 4 fields: Application Name: App name that you see when you install an app Company Domain: You can set any domain Package Name: This name will be unique for each app. That is auto-generated as you type Application Name, it refers as per Company Domain. You can manually edit it. Project Location: Source directory of your project. Click Next , you will see below screen. This is screen for asking which types of devices does support your app. By default, its set to Phone and Tablet and set to your minimum SDK Version. Other options are: Wear: For wear devices like Andro

Get Current Location using GPS/Network Provider

Hello to all, Today I teach you that how can we get current location. In android's new SDK tools, LocationManager class does not give any network provider's status. It always gives null value. Still it works in some of the android devices rarely. So that's why I include code for both network provider and gps provider for getting current location. Create one service class name LocationFinder  and implements it LocationListener . All the code which is related to Location, is doing in that service class and from MainActivity , call its method through its instance in onResume() method. The reason you know, why its called in onResume(), because when you enable GPS and come back in activity, then its again check Location's status. In the code, if GPS not enable, I show settings alert pop-up, to go settings menu. When you enable GPS, you will get current location after 2-3 seconds. If not, come again to activity and surely get location. Make sure, must add persmi

Detect Internet Connection

Let's test a code in which you can detect if there is an active internet connectivity or not in your app programmatically. Create one class named Functions Create one method in that class as below: public static boolean isConnecting(Context context) { ConnectivityManager connectivityManager = (ConnectivityManager) context.getSystemService(Context. CONNECTIVITY_SERVICE ); NetworkInfo activeNetworkInfo = connectivityManager.getActiveNetworkInfo(); return activeNetworkInfo != null && activeNetworkInfo.isConnected(); } Now in your Activity, do this at where you want to check internet connection status: if (Functions.isConnecting(this)) { // you have internet connection // do your stuff here } else { Toast.makeText(this, "No internet connecion.", Toast.LENGTH_LONG).show(); }

Set current date to Button and Datepicker dialog

This tutorial is going to explain how to set current date on Button and when you click on that Button, DatePicker Dialog open to ask your new Date. When you set Date from datepicker dialog, selected Date will be set to that Button. A simple Layout with just only Button.   <Button         android:id="@+id/date"         android:layout_width="match_parent"         android:layout_height="wrap_content"         android:layout_marginTop="10dp"         android:onClick="setDate" /> For Date related task, you have to use Calendar class. And to get current Date, use method getInstance() of Calendar class. Calendar cal = Calendar.getInstance(); mYear = cal.get(Calendar.YEAR); mMonth = cal.get(Calendar.MONTH); mDay = cal.get(Calendar.DAY_OF_MONTH); mYear, mMonth, mDay is of int type. Now set date on Button: Button date = (Button) findViewById(R.id.date); date.setText( new StringBuilder().append( mDay ).append("/"